


Unlocking the Full Potential of Your Sharp AR 5516 Scanner with the Windows 10 64-bit Driver
Are you the proud owner of a Sharp AR 5516 scanner and looking to maximize its capabilities on your Windows 10 64-bit system? If so, you’ve come to the right place. In this comprehensive guide, we’ll delve into the intricacies of the Sharp AR 5516 scanner driver for Windows 10 64-bit, ensuring that you get the most out of your scanning experience.
Understanding the Sharp AR 5516 Scanner

The Sharp AR 5516 scanner is a versatile device designed to cater to both personal and professional needs. With its high-quality scanning capabilities, it can handle a wide range of documents, from simple text to complex images. Before we dive into the driver, let’s take a quick look at some of the key features of the Sharp AR 5516 scanner:
| Feature | Description |
|---|---|
| Scan Speed | Up to 16 pages per minute |
| Resolution | Up to 600 dpi |
| Scan Format | PDF, JPEG, TIFF, and BMP |
| Interface | USB 2.0 |
These features make the Sharp AR 5516 scanner an excellent choice for anyone looking for a reliable and efficient scanning solution.
Downloading the Sharp AR 5516 Scanner Driver for Windows 10 64-bit

Now that you’re familiar with the scanner’s capabilities, it’s time to download and install the appropriate driver for your Windows 10 64-bit system. Here’s how to do it:
- Visit the official Sharp website or a trusted third-party driver download site.
- Enter your scanner model (AR 5516) and select the operating system (Windows 10 64-bit) from the dropdown menu.
- Locate the driver for your scanner and click on the download link.
- Save the downloaded file to a location on your computer where you can easily find it.
Once the download is complete, proceed to the next step to install the driver.
Installing the Sharp AR 5516 Scanner Driver
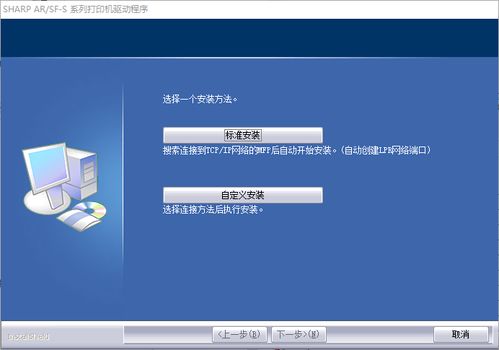
Now that you have the driver downloaded, it’s time to install it on your Windows 10 64-bit system. Follow these steps:
- Double-click on the downloaded driver file to begin the installation process.
- Follow the on-screen instructions to install the driver.
- Restart your computer if prompted to do so.
After the installation is complete, your Sharp AR 5516 scanner should be ready to use with your Windows 10 64-bit system.
Configuring the Scanner Settings
Once the driver is installed, you may want to configure the scanner settings to ensure optimal performance. Here’s how to do it:
- Open the Scanner Settings window by clicking on the Start button, typing “Scanner Settings,” and pressing Enter.
- Select your Sharp AR 5516 scanner from the list of available scanners.
- Adjust the scanning settings to your preference, such as resolution, scan format, and scan speed.
- Save your settings and close the Scanner Settings window.
By customizing the scanner settings, you can ensure that your scanning experience is tailored to your specific needs.
Using the Scanner with Windows 10 64-bit
Now that your Sharp AR 5516 scanner is properly installed and configured, it’s time to start using it with your Windows 10 64-bit system. Here’s a quick overview of the process:
- Connect your scanner to your computer using the USB cable.
- Open the Scanner Settings window and select your Sharp AR 5516 scanner.
- Adjust the scanning settings as needed.
- Click on the “Scan” button to


