


How to Connect AR Drone 2.0 to iPhone: A Comprehensive Guide
Connecting your AR Drone 2.0 to your iPhone is a thrilling experience that opens up a world of aerial adventures. Whether you’re a drone enthusiast or a beginner, this guide will walk you through the process step by step. Let’s dive in!
Understanding the Equipment

Before you start, it’s essential to understand the equipment you’ll be using. The AR Drone 2.0 is a quadcopter that requires a controller to fly. The iPhone, on the other hand, serves as the controller in this setup. Here’s a quick rundown of the components you’ll need:
| Component | Description |
|---|---|
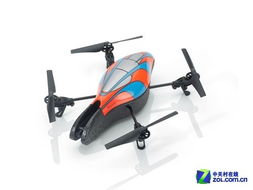
| AR Drone 2.0 | The quadcopter itself, which is controlled via the iPhone. |
| iPhone | The smartphone that acts as the controller for the drone. |
| AR.Drone 2.0 App | The app that allows you to control the drone using your iPhone. |
| Wi-Fi Network | A stable Wi-Fi network is required for the drone to connect to your iPhone. |
Now that you know what you’re working with, let’s move on to the actual connection process.
Step 1: Download and Install the AR.Drone 2.0 App
The AR.Drone 2.0 app is available for both iOS and Android devices. To download it, follow these steps:
- Open the App Store on your iPhone.
- Search for “AR.Drone 2.0” in the search bar.
- Tap on the app and then tap “Get” to download and install it.
Once the app is installed, you’re ready to move on to the next step.
Step 2: Power on the AR Drone 2.0
Locate the power switch on the drone and turn it on. The LED lights on the front of the drone will start to blink, indicating that it’s powered on.
Step 3: Connect to a Wi-Fi Network
Your iPhone needs to be connected to a Wi-Fi network to communicate with the drone. Here’s how to do it:
- On your iPhone, go to Settings > Wi-Fi.
- Make sure Wi-Fi is turned on.
- Select your home Wi-Fi network from the list of available networks.
- Enter the Wi-Fi password if prompted.
Once your iPhone is connected to the Wi-Fi network, proceed to the next step.
Step 4: Pair the Drone with Your iPhone
Open the AR.Drone 2.0 app on your iPhone. The app will automatically search for the drone. Once it finds it, follow these steps:
- Tap on the drone’s name in the list of available drones.
- Wait for the app to establish a connection with the drone.
- Once the connection is established, you’ll see a message indicating that the drone is connected to your iPhone.
Now that your iPhone is connected to the drone, you’re ready to fly!
Step 5: Flying the AR Drone 2.0
With the drone connected to your iPhone, you can now start flying. Here’s a quick overview of the controls:
- Throttle: Tilt the iPhone up to increase altitude and down to decrease altitude.
- Roll: Tilt the iPhone left or right to roll the drone.
- Pitch: Tilt the iPhone forward or backward to pitch the drone.
- Yaw: Swipe left or right on the screen to yaw the drone.
Remember to keep the drone within your line of sight and within the legal flying area. Have fun and enjoy your aerial adventures!

 System")

