


How to Set IP Address in Sharp AR 6020N on Windows 10
Setting up the IP address on your Sharp AR 6020N printer is a crucial step to ensure seamless connectivity and efficient network management. In this guide, I’ll walk you through the process step by step, ensuring that you can easily configure your printer’s IP address on Windows 10.
Understanding the Importance of IP Address Configuration

Your printer’s IP address is its unique identifier on the network. It allows your computer to locate and communicate with the printer. Properly setting the IP address ensures that you can print documents without any connectivity issues.
Step-by-Step Guide to Set IP Address on Sharp AR 6020N
Follow these detailed steps to set the IP address on your Sharp AR 6020N printer:
- Turn on your Sharp AR 6020N printer and wait for it to initialize.
- Connect your printer to your computer using a USB cable or ensure that it is connected to the network.
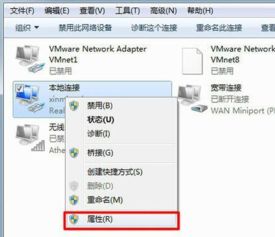
- On your computer, open the Control Panel. You can do this by clicking on the Start button, typing “Control Panel,” and pressing Enter.
- In the Control Panel, click on “Devices and Printers.” This will open a window displaying all the devices connected to your computer, including your printer.
- Right-click on your Sharp AR 6020N printer and select “Printer properties.” This will open a new window with various tabs.
- Go to the “General” tab and click on the “Printer” link. This will open the printer’s properties window.
- In the printer properties window, click on the “Configure” button. This will open the printer’s configuration settings.
- Look for the “Network” or “TCP/IP” settings. Click on it to expand the options.
- Select the “Manual IP Address” option and enter the desired IP address, subnet mask, and default gateway. Make sure that the IP address is within the range of your network.
- Click “Apply” and then “OK” to save the changes.
- Restart your printer to apply the new IP address.
Verifying the IP Address Configuration
After setting the IP address, it’s essential to verify that the configuration was successful. Here’s how you can do it:
- On your computer, open the Command Prompt. You can do this by searching for “cmd” in the Start menu and pressing Enter.
- In the Command Prompt, type “ipconfig” and press Enter. This will display the IP configuration of all devices connected to your network.
- Look for your Sharp AR 6020N printer in the list of devices. The IP address displayed should match the one you configured.
Common Issues and Solutions
While setting up the IP address, you may encounter some common issues. Here are some solutions to help you resolve them:
| Issue | Solution |
|---|---|
| Printer not found in Devices and Printers | Ensure that the printer is connected to the computer or network. If using a USB connection, try a different USB port. If using a network connection, check the network cable and router settings. |
| Unable to set IP address manually | Check if the printer supports manual IP address configuration. If not, try using the automatic IP address configuration feature. |
| IP address conflict | Ensure that the IP address you entered is unique and not already in use on the network. You can use a different IP address or release the conflicting IP address from another device. |
Conclusion
Setting up the IP address on your Sharp AR 6020N printer on Windows 10 is a straightforward process. By following the steps outlined in this guide, you can ensure that your printer is connected to the network and ready for printing. If you encounter any issues, refer to the common problems and solutions section to resolve them.


