


How to Set IP Address in Sharp AR 6020N
Setting up the IP address on your Sharp AR 6020N printer is a crucial step to ensure that it can connect to your network and function efficiently. In this guide, I will walk you through the process in a detailed and multi-dimensional manner, ensuring that you have all the information you need to successfully configure your printer’s IP address.
Understanding the Importance of IP Address Configuration

Your printer’s IP address is its unique identifier on the network. It allows your printer to communicate with other devices, such as your computer or a network scanner. Properly setting the IP address ensures seamless printing and scanning operations.
Preparation Before Starting
Before you begin, make sure you have the following items ready:
- Sharp AR 6020N printer
- Computer with internet access
- Network cable (if connecting via wired Ethernet)
- Wireless network name and password (if connecting via Wi-Fi)
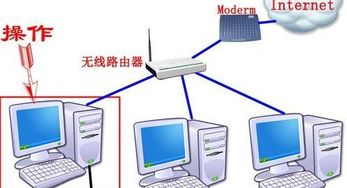
Connecting the Printer to the Network
There are two methods to connect your Sharp AR 6020N printer to the network: wired Ethernet and Wi-Fi. Choose the method that suits your needs.
Wired Ethernet Connection
1. Connect one end of the network cable to the Ethernet port on the back of your printer.
2. Connect the other end of the cable to an available Ethernet port on your router or switch.
3. Power on the printer and wait for it to initialize.
Wi-Fi Connection
1. Turn on your printer and access the printer’s control panel.
2. Navigate to the network settings menu and select Wi-Fi setup.
3. Choose the Wi-Fi network you want to connect to and enter the password.
4. Follow the on-screen instructions to complete the Wi-Fi setup.
Accessing the Printer’s Web Interface
Once your printer is connected to the network, you can access its web interface to configure the IP address. Here’s how to do it:
1. Open a web browser on your computer.
2. Enter the printer’s IP address in the address bar. You can find the IP address on the printer’s control panel or in the network settings menu.
3. Press Enter, and you should see the printer’s web interface.
Configuring the IP Address
Now that you have accessed the printer’s web interface, follow these steps to configure the IP address:
- Log in to the web interface using the default username and password, which are usually “admin” for both fields.
- Locate the “Network Settings” or “TCP/IP” section.
- Under the IP Address settings, you can choose to either manually set the IP address or use DHCP (Dynamic Host Configuration Protocol) to automatically assign an IP address.
- If you choose to manually set the IP address, enter the desired IP address, subnet mask, and default gateway. Make sure the IP address is within the range of your network.
- Save the changes and restart the printer.
Verifying the IP Address Configuration
After the printer has restarted, you can verify that the IP address configuration was successful by checking the printer’s status on your network. Here’s how:
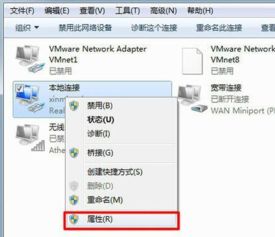
- Open the “Network” or “Control Panel” on your computer.
- Look for the printer’s IP address in the list of devices connected to your network.
- Double-click the printer’s name to open the printer’s properties.
- Check the IP address listed in the properties to ensure it matches the one you configured.
Conclusion
Setting up the IP address on your Sharp AR 6020N printer is a straightforward process that ensures seamless network connectivity. By following the steps outlined in this guide, you can easily configure your printer’s IP address and enjoy efficient printing and scanning operations.


